I’m writing this blog post because of a set-up problem some friends had in a security class. There was an exercise about reverse engineering an x86 Linux binary, and this was a problem for people with Apple Silicon MacBooks, because it has an ARM processor. This means running an x86 binary is not that straightforward.
My idea was to make an x86 virtual machine of Linux with QEMU (with which I had some experience before) to run a system similar to what the professor was using, but unfortunately this process was being way harder than it should, and we couldn’t find a good step-by-step tutorial 🙁
So I’m writing this to help lazy people like me who would like to get a simple tutorial with commands they can just copy-and-paste and make things work, but without sacrificing the understanding of the solution. This strategy emulates the whole x86 computer, so any feature of the host ARM processor shouldn’t have any effect, on the other hand performance is bad.
Other than setting up QEMU by hand, I found out about the UTM project, which creates a more user-friendly interface for QEMU and officially supports running x86 guest machines on ARM hosts. But for this post I’d like to dig deeper in how emulation works and show a solution that can be more easily adapted to other systems.
Intro to QEMU

QEMU (an acronym for Quick EMUlator) is an Open Source project for machine emulation and virtualization. It uses emulation to run a machine with a different architecture from the host machine (e.g. running MIPS Linux in an x86 PC), but, if the architecture is the same, emulation is not necessary and it can use the processor more directly with only some isolation from the main system.
It supports many different operating systems, Linux, Windows, Mac Os, and BSDs. And also many different processor architectures , like x86_64, ARM, MIPS, RISC-V. So it’s a very portable and versatile technology. One common application that uses it is the Android Studio’s emulator, AVD, as shown in the documentation.
QEMU can run in two different modes: user, and system. User mode runs a binary directly in your current system by emulating the processor and translating the syscalls to the host’s kernel, but it’s only available for Linux and BSD. System mode on the other hand creates a whole virtual computer with it’s own processor, memory, storage, network and other devices.
For our problem, we have to use the full emulation with qemu-system, since it’s running on a Mac OS and qemu-user doesn’t support it. We also can’t use virtualization because the host architecture (ARM) is different from the guest architecture (x86).
Setting it up
From the download page we can install it from Homebrew:
brew install qemuAfter a while the program should be installed. Before continuing we have to create a virtual hard drive.
qemu-img create -f qcow2 linux_hd.qcow2 20GIn this command qemu-img is the utility to deal with filesystem images, create is the command to make a new image, -f qcow2 is the setting to select the qcow2 format, linux_hd.qcow2 is the file name and 20G is the max HD size. The qcow2 format is interesting because it’s the most versatile and supports encryption, compression and multiple snapshots.
With the hard drive in hand, we can start our system with an x86 Linux installation image. For this case it’s important to choose a lightweight one because the performance will be poor since we’re emulating. In this example I’m using the this Puppy Linux disk image file.
qemu-system-x86_64 -m 1G -smp 2 -accel hvf -accel tcg \
 -hda linux_hd.qcow2 \
 -cdrom fossapup64-9.5.iso -boot d
This command is what actually creates and runs the virtual machine. The first line defines the machine characteristics: -m sets the guest machine RAM to 1GB, -smp selects the number of cores of the guest machine. Feel free to change give the VM more memory and processors to get more performance inside the VM (and worse performance outside it).
Finally -accel selects the accelerator for better performance. hvf is MacOs native hypervisor, but it may not be available for a x86-on-ARM VM, so there’s also QEMU’s tcg as a fallback.
The second line includes our newly created hard drive as the first one for the system with -hda, and the third line sets the boot from the installation disk by loading the .iso file with -cdrom and choosing it as boot medium with -boot d (for this setting, ‘a’ and ‘b’ means floppy disk, ‘c’ means main HD, ‘d’ means optical disk).
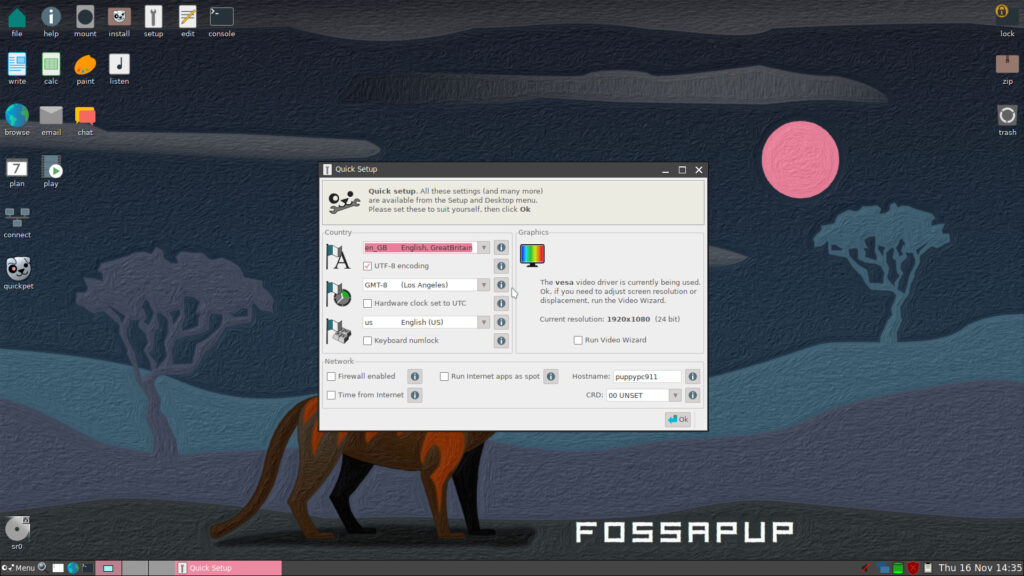
So, running the command we should now have a screen 🙂

Some handy keyboard shortcuts now that we have screen are ctrl+alt+g for swapping the cursor from the host to the guest, ctrl+alt++ or ctrl+alt+- to change the display size and ctrl+alt+f to get to full screen mode. Now we can just install the system as normal.
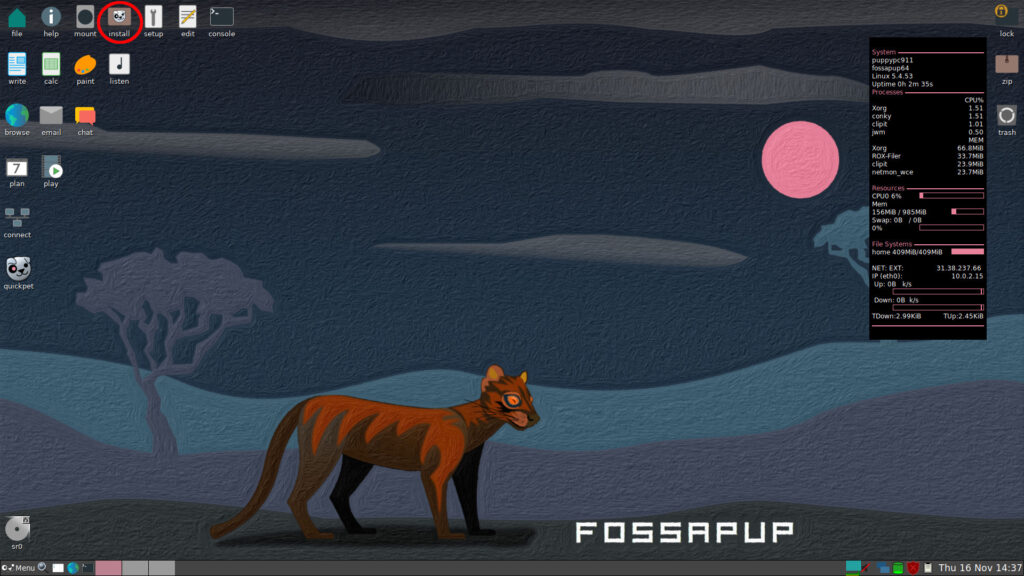
For permanent installation of the system we should use the icon on top of the screen. In the installer window, the simplest way to install is by the third icon, “Install” and selecting “internal hard drive” and the only hard disk available.

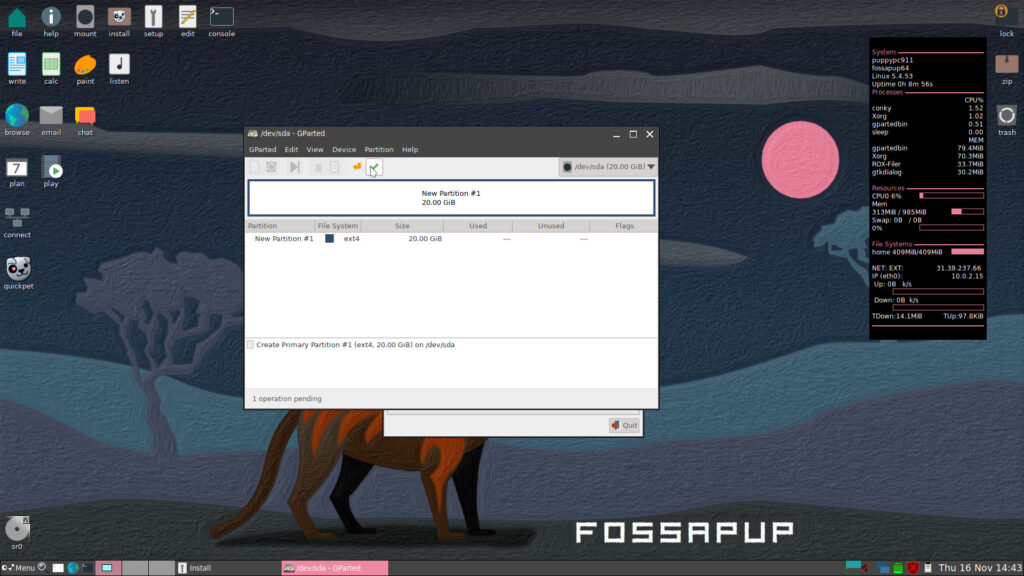
This hard disk has no partitioning because we just created it, so we have to configure it with GParted. At the top of the window we can create a partition table in “Device > Create Partition Table …” to create an “msdos” table. Then we have to create a partition by right-clicking the unallocated area and adding a ext4 partition for the whole disk. Then we apply all this changes by clicking the green checkmark.

After this, right-click the partition and use “Manage Flags” to set it as bootable and the hard disk should be ready. We can now close GParted and “Install Puppy to sda1” is now available. Then, there should be the installation of GRUB4DOS and some simple settings. Now the system is installed and we can just shutdown.
For the next initializations of this system, the installation CD is not necessary anymore, so we remove it from the command and it’s also a good moment to add a name for the machine.
qemu-system-x86_64 -m 1G -smp 2 -accel hvf -accel tcg \
-hda linux_hd.qcow2 \
-name x86-on-arm
Now everything should be working properly. Also, I’d recommend looking at QEMU manual pages with man qemu-system-x86_64 to get a good grasp of all its capabilities, because it describes a great amount of settings, like enabling snapshots or using a remote server as hard drive.
Other useful tricks
To transfer files between the host and the guest, one can use QEMU’s Virtual FAT device to share a folder between the two, just be careful not to write any file to it while guest is running because the feature is in beta and behaves weirdly.
-hdb fat:rw:<shared_directory>Since performance reduced in the guest machine, it may also be useful use the host machine to compile code for the guest machine. This can be done with a cross-compiling toolchain like osxcross or dockcross.
Conclusion
This procedure is able to get an x86 system running on an Apple Silicon Mac and should be useful for tasks involving Linux compiled binaries for x86 without worrying about system differences. The performance in poor, but it should be usable, and this guide can be easily adapted to emulate other systems in other devices. QEMU is just versatile like that 😉
1 Comment
This is super helpful! Thank you a lot Alex!